
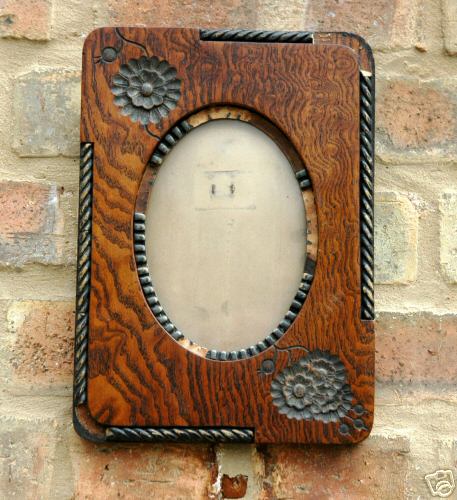
My late 1800's picture frame needed a lot of work. But I really like the oak wood grain and carvings. I went out and bought some of that polymer clay and made a mold from the areas that weren't damaged. Baking the clay mold in a toaster oven according to instructions yielded me nice molds. I tried to press the new clay into the mold but it distorted when I tried to remove it as it would stick. I then dusted the mold with some talc powder like the instructions tell you to do (if I just would follow instructions to begin with I wouldn't have so much frustrations in my life!) and carefully place the clay in the areas that are missing and trimmed it down to size and conformed it to the shape. Hint, dust that area, too, before placing it down or it will distort when you try and take it back up. I then baked the pieces, did a little more carving on them to make an exact fit and glued them down with wood glue. The next day I painted them to match the rest of the decoration. The color was slightly off so I just lightly brushed over all the decoration so they would match. I gave the wood a very light "French polish" with some garnet de-waxed shellac. I like how it turned out. Now that I have done it, I know I can save some other items that are damaged instead of just tossing them. Endless possibilities!

4 comments:
Wow, that's awesome! You can't even tell a repair has been made. You did a great job!
Nicely done! How did you date it?
you are so creative!
the frame looks great! good work. i am an art teacher and polymer clay is such a wonderful material we use alot. never thought of your use though:) thanks for the inspiration and comments on my blog:)
Post a Comment